


a. Compilation process.
In this chapter we begin by outlining the basic processes you need to go through in order to compile your C (or C++) programs. We then proceed to formally describe the C compilation model and also how C supports additional libraries.
Creating, Compiling and Running Your Program
The stages of developing your C program are as follows. (See AppendixCreating the program
Create a file containing the complete program, such as the above example. You can use any ordinary editor with which you are familiar to create the file. One such editor is textedit available on most UNIX systems.The filename must by convention end ``.c'' (full stop, lower case c), e.g. myprog.c or progtest.c. The contents must obey C syntax. For example, they might be as in the above example, starting with the line /* Sample .... (or a blank line preceding it) and ending with the line } /* end of program */ (or a blank line following it).
Compilation
There are many C compilers around. The cc being the default Sun compiler. The GNU C compiler gcc is popular and available for many platforms. PC users may also be familiar with the Borland bcc compiler.There are also equivalent C++ compilers which are usually denoted by CC (note upper case CC. For example Sun provides CC and GNU GCC. The GNU compiler is also denoted by g++
Other (less common) C/C++ compilers exist. All the above compilers operate in essentially the same manner and share many common command line options. Below and in Appendix
For the sake of compactness in the basic discussions of compiler operation we will simply refer to the cc compiler -- other compilers can simply be substituted in place of cc unless otherwise stated.
To Compile your program simply invoke the command cc. The command must be followed by the name of the (C) program you wish to compile. A number of compiler options can be specified also. We will not concern ourselves with many of these options yet, some useful and often essential options are introduced below -- See Appendix
Thus, the basic compilation command is:
cc program.c
where program.c is the name of the file.
If there are obvious errors in your program (such as mistypings, misspelling one of the key words or omitting a semi-colon), the compiler will detect and report them.
There may, of course, still be logical errors that the compiler cannot detect. You may be telling the computer to do the wrong operations.
When the compiler has successfully digested your program, the compiled version, or executable, is left in a file called a.out or if the compiler option -o is used : the file listed after the -o.
It is more convenient to use a -o and filename in the compilation as in
cc -o program program.c
which puts the compiled program into the file program (or any file you name following the "-o" argument) instead of putting it in the file a.out .
Running the program
The next stage is to actually run your executable program. To run an executable in UNIX, you simply type the name of the file containing it, in this case program (or a.out)This executes your program, printing any results to the screen. At this stage there may be run-time errors, such as division by zero, or it may become evident that the program has produced incorrect output.
If so, you must return to edit your program source, and recompile it, and run it again.
The C Compilation Model
We will briefly highlight key features of the C Compilation model (Fig. 2.1) here.
Fig. 2.1 The C Compilation Model
The Preprocessor
We will study this part of the compilation process in greater detail later (Chapter 13. However we need some basic information for some C programs.The Preprocessor accepts source code as input and is responsible for
- removing comments
- interpreting special preprocessor directives denoted by #.
- #include -- includes contents of a named file. Files
usually called header files. e.g
- #include <math.h> -- standard library maths file.
- #include <stdio.h> -- standard library I/O file
- #define -- defines a symbolic name or constant. Macro
substitution.
- #define MAX_ARRAY_SIZE 100
C Compiler
The C compiler translates source to assembly code. The source code is received from the preprocessor.Assembler
The assembler creates object code. On a UNIX system you may see files with a .o suffix (.OBJ on MSDOS) to indicate object code files.Link Editor
If a source file references library functions or functions defined in other source files the link editor combines these functions (with main()) to create an executable file. External Variable references resolved here also. More on this later (Chapter 34).Some Useful Compiler Options
Now that we have a basic understanding of the compilation model we can now introduce some useful and sometimes essential common compiler options. Again see the online man pages and Appendix- -c
- Suppress the linking process and produce a .o file for each source file listed. Several can be subsequently linked by the cc command, for example: cc file1.o file2.o ...... -o executable
- -llibrary
- Link with object libraries. This option must follow the source file
arguments. The object libraries are archived and can be standard, third party or user created
libraries (We discuss this topic briefly below and also in detail later
(Chapter 34). Probably the most commonly used library is the math library (
math.h). You must link in this library explicitly if you wish to use the maths functions
(note do note forget to #include <math.h> header file), for example:
cc calc.c -o calc -lm
Many other libraries are linked in this fashion (see below) - -Ldirectory
- Add directory to the list of directories containing object-library routines. The linker always looks for standard and other system libraries in /lib and /usr/lib. If you want to link in libraries that you have created or installed yourself (unless you have certain privileges and get the libraries installed in /usr/lib) you will have to specify where you files are stored, for example: cc prog.c -L/home/myname/mylibs mylib.a
- -Ipathname
- Add pathname to the list of directories in which
to search for #include files with relative
filenames (not beginning with slash /).
BY default, The preprocessor first searches for #include files in
the directory containing source file, then in
directories named with -I options (if any), and
finally, in /usr/include. So to include header files stored in
/home/myname/myheaders you would do:
cc prog.c -I/home/myname/myheaders
Note: System library header files are stored in a special place (/usr/include) and are not affected by the -I option. System header files and user header files are included in a slightly different manner (see Chapters 13 and 34) - -g
- invoke debugging option. This instructs the compiler to produce additional symbol table information that is used by a variety of debugging utilities.
- -D
- define symbols either as identifiers (-Didentifer) or as values (-Dsymbol=value) in a similar fashion as the #define preprocessor command. For more details on the use of this argument see Chapter 13.
Using Libraries
C is an extremely small language. Many of the functions of other languages are not included in C. e.g. No built in I/O, string handling or maths functions.What use is C then?
C provides functionality through a rich set function libraries.
As a result most C implementations include standard libraries of functions for many facilities ( I/O etc.). For many practical purposes these may be regarded as being part of C. But they may vary from machine to machine. (cf Borland C for a PC to UNIX C).
A programmer can also develop his or her own function libraries and also include special purpose third party libraries (e.g. NAG, PHIGS).
All libraries (except standard I/O) need to be explicitly linked in with the -l and, possibly, -L compiler options described above.
UNIX Library Functions
The UNIX system provides a large number of C functions as libraries. Some of these implement frequently used operations, while others are very specialised in their application.Do Not Reinvent Wheels: It is wise for programmers to check whether a library function is available to perform a task before writing their own version. This will reduce program development time. The library functions have been tested, so they are more likely to be correct than any function which the programmer might write. This will save time when debugging the program.
Later chapters deal with all important standard library issues and other common system libraries.
Finding Information about Library Functions
The UNIX manual has an entry for all available functions. Function documentation is stored in section 3 of the manual, and there are many other useful system calls in section 2. If you already know the name of the function you want, you can read the page by typing (to find about sqrt):man 3 sqrt
If you don't know the name of the function, a full list is included in the introductory page for section 3 of the manual. To read this, type
man 3 intro
There are approximately 700 functions described here. This number tends to increase with each upgrade of the system.
On any manual page, the SYNOPSIS section will include information on the use of the function. For example:
  #include <time.h>

  char *ctime(time_t *clock)
This means that you must have
#include <time.h>in your file before you call ctime. And that function ctime takes a pointer to type time_t as an argument, and returns a string (char *). time_t will probably be defined in the same manual page.
The DESCRIPTION section will then give a short description of what the function does. For example:
  ctime() converts a long integer, pointed to by clock,  to  a
  26-character  string  of the form produced by asctime().
Lint -- A C program verifier
You will soon discover (if you have not already) that the C compiler is pretty vague in many aspects of checking program correctness, particularly in type checking. Careful use of prototyping of functions can assist modern C compilers in this task. However, There is still no guarantee that once you have successfully compiled your program that it will run correctly.The UNIX utility lint can assist in checking for a multitude of programming errors. Check out the online manual pages (man lint) for complete details of lint. It is well worth the effort as it can help save many hours debugging your C code.
To run lint simply enter the command:
lint myprog.c.
Lint is particularly good at checking type checking of variable and function assignments, efficiency, unused variables and function identifiers, unreachable code and possibly memory leaks. There are many useful options to help control lint (see man lint).
Exercises
Exercise 12171Enter, compile and run the following program:
 main()

 { int i;

    printf("\t Number \t\t Square of Number\n\n");

    for (i=0; i<=25;++i)
            printf("\t %d \t\t\t %d \n",i,i*i);

 }
Exercise 12172The following program uses the math library. Enter compile and run it correctly.
#include <math.h>

 main()

 { int i;

    printf("\t Number \t\t Square Root of Number\n\n");

    for (i=0; i<=360; ++i)
            printf("\t %d \t\t\t %d \n",i, sqrt((double) i));

 }
Exercise 12173Look in /lib and /usr/lib and see what libraries are available.
- Use the man command to get details of library functions
- Explore the libraries to see what each contains by running the command ar t libfile.
Look in /usr/include and see what header files are available.
- Use the more or cat commands to view these text files
- Explore the header files to see what each contains, note the include, define, type definitions and function prototypes declared in them
Suppose you have a C program whose main function is in main.c and has other functions in the files input.c and output.c:
- What command(s) would you use on your system to compile and link this program?
- How would you modify the above commands to link a library called process1 stored in the standard system library directory?
- How would you modify the above commands to link a library called process2 stored in your home directory?
- Some header files need to be read and have been found to located in a header subdirectory of your home directory and also in the current working directory. How would you modify the compiler commands to account for this?
Suppose you have a C program composed of several separate files, and they include one another as shown below:
| File | Include Files |
| main.c | stdio.h, process1.h |
| input.c | stdio.h, list.h |
| output.c | stdio.h |
| process1.c | stdio.h, process1.h |
| process2.c | stdio.h, list.h |
- Which files have to recompiled after you make changes to process1.c?
- Which files have to recompiled after you make changes to process1.h?
- Which files have to recompiled after you make changes to list.h?
how to
b. Execute the program.
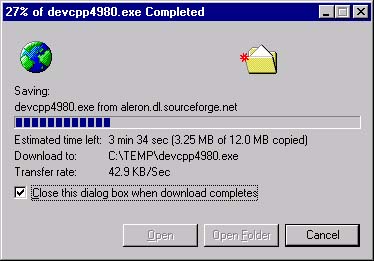
Get Dev-C++ 5.0 beta 9.2 (4.9.9.2) (9.0 MB) with Mingw/GCC 3.4.2 Although this is a "beta" version, it works perfectly fine. Click on SourceForge to go to a list of download sites and pick one. The file will be something like devcpp4.9.9.2_setup.exe. Save this file in a place like C:\Temp.
When the download is complete, click on the "open" button to start the installation process. (Or go to C:\Temp andDouble click on devcpp4.9.9.2_setup.exe). You will see a few screens that ask you to pick a language (English) and to agree to the license terms. Choose a "typical" installation.
Answer "yes" when it asks if you wish to install Dev-cpp for all users. Note: if the installation fails, re-install and try "no" for this.Accept the suggested destination for the installation:
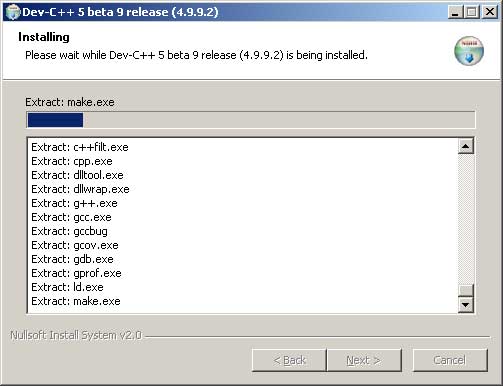
Many subdirectories and files are extracted to the destintion:
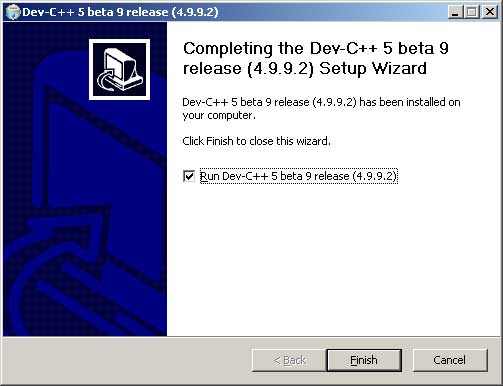
A screen says the installation is complete:
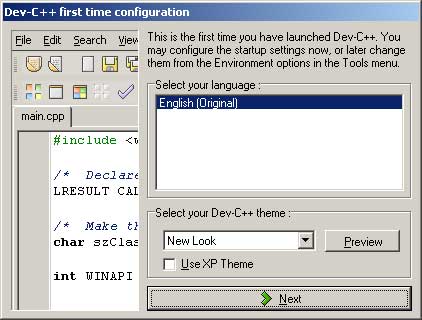
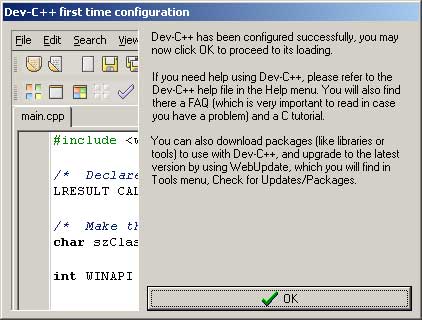
Keep the check mark in the box. Click on "Finish". A first-time configuration screen appears:
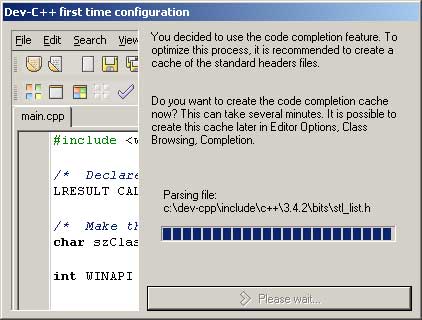
Pick "English" and "New Look". In the next several screens, hit "Yes" for its suggestions.
Eventually you are done. Click "OK".
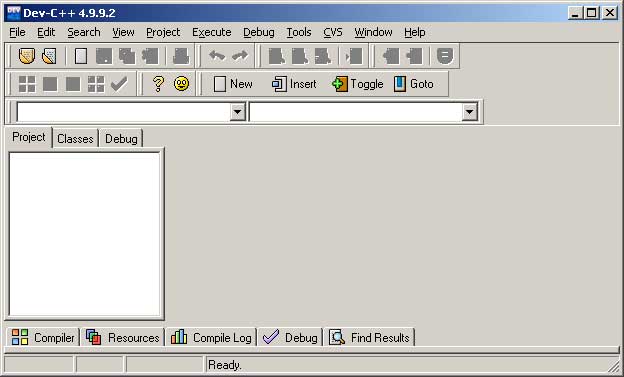
II. DEV-C++ starts up. Try out the installation with a simple C program.
Details:The program starts up automatically.
Click File/New/Project. Pick a name for the project (such as "myProject"). Click "C Project". Click on "Empty Project". Click "OK".
In "Create New Project", click "save" (later on you will probably want to create separate subdirectories for your various projects.).
Click "File/New/Source File" and in "Add source file to current project" click "Yes". You now get a screen where you can edit the source file.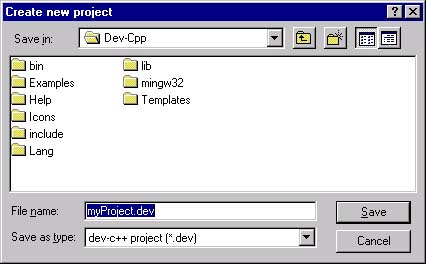
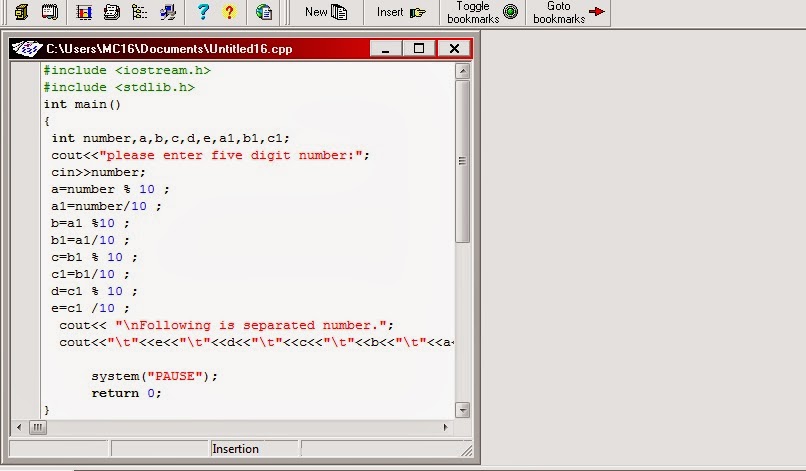
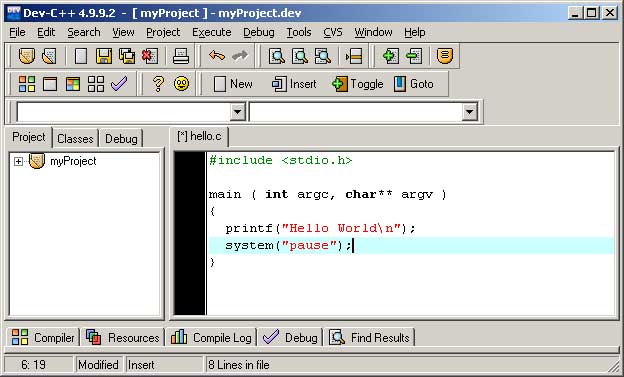
Type in a simple C program, as below. Now click "File/Save As" and save the file as "hello.c" (or other name.) Important: be sure that the file extension is .c. With any other extension (such as the suggested .cpp) you will have problems compiling.
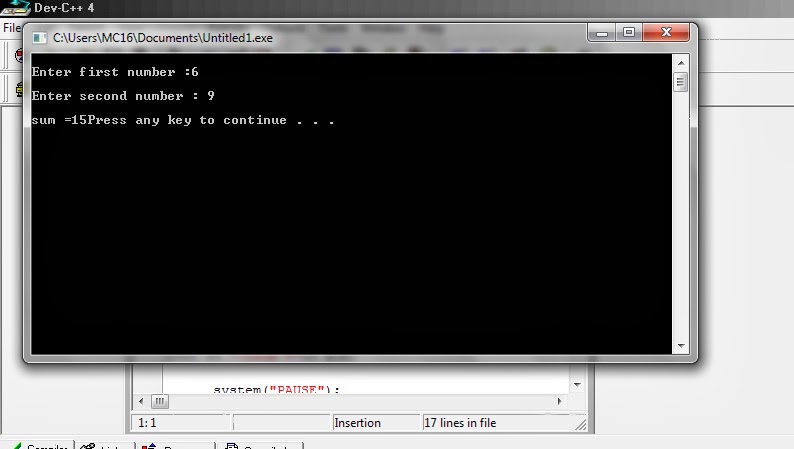
Now click "Execute/Compile and Run"
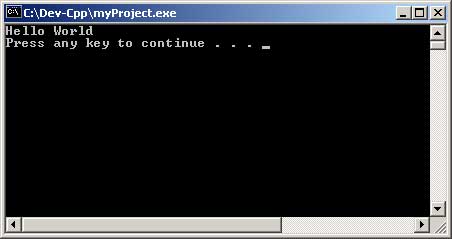
The program will (hopefully) compile, run, and write its output to a DOS window. If you have thesystem("pause")statement in your program, the output will stay in the window until you hit a key. Another way to run the program (after it has been compiled) is to start a DOS window outside of the Dev-Cpp system, then navigate to the subdirectory that holds your project, and type hello.exe.
At this point, the compiler and development environment has been installed. You should find Dev-C++ listed under "Programs" on the "Start" menu and will now be able to write, compile, and run C (and C++) programs. You will have include files, libraries, and dll's for OpenGL (and all other standard packages) but not GLUT. GLUT manages the windows and other user interface components needed for OpenGL programming, and needs to be separately installed.
If you do not need GLUT , you can quit now.
III. Download and install GLUT
To run OpenGL with GLUT (which is what the programs in Angel's book use), you need to get three files and place each file in its proper directory. All the files you need (and more) are contained in one zip file.Details:
Download GLUT files from http://chortle.ccsu.edu/Bloodshed/glutming.zip Download the fileglutming.zipSave the zip file in some convenient location (perhaps C:\temp).
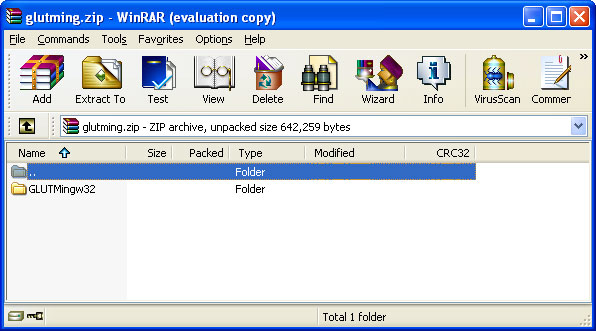
Double click on glutming.zip (or otherwise unzip it). You will see the files that are in the zip archive. (Your un-zipping program will probably be diferent than the one shown here, but should work about the same.)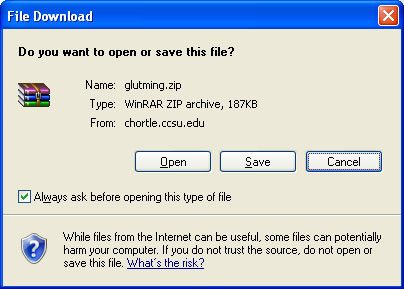
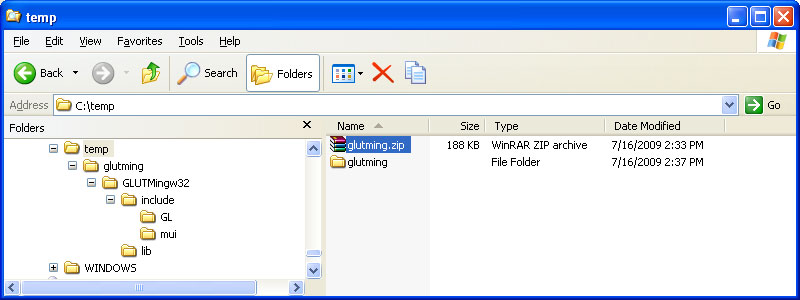
Click on "Extract" to extract all the subdirectories and files. Pick some convenient directory to extract them to (perhaps C:\temp\glutming). You only need three files, but extract all of them anyway.
Only three of the files in the various subdirectories are needed. Each of the three files should be put in a subdirectory with other files of its type. Use Explorer to move the files to where they are needed.
Note: If you only see some of these files listed in Explorer, click on "View/Options/View" and then select the radio button "Show all Files".
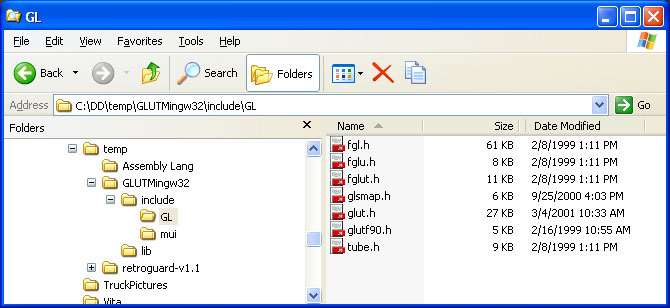
glut.h -- copy this file to C:\Dev-Cpp\include\GL
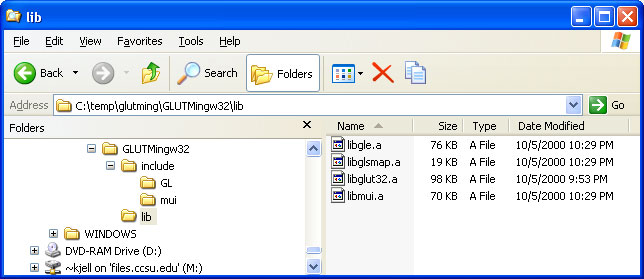
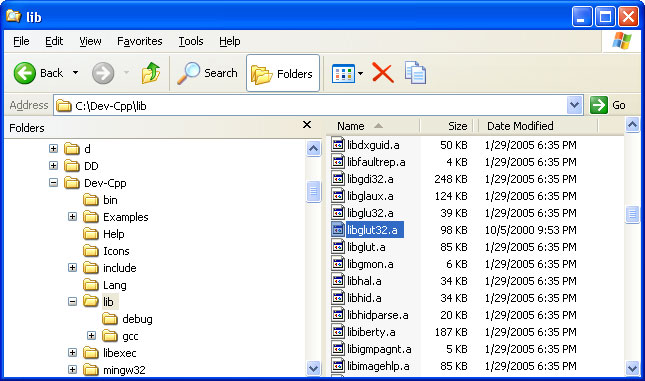
Copy from your "unzipped" subdirectories (wherever they are):libglut32.a -- copy this file from your unzipped directories to C:\Dev-Cpp\lib
To here:
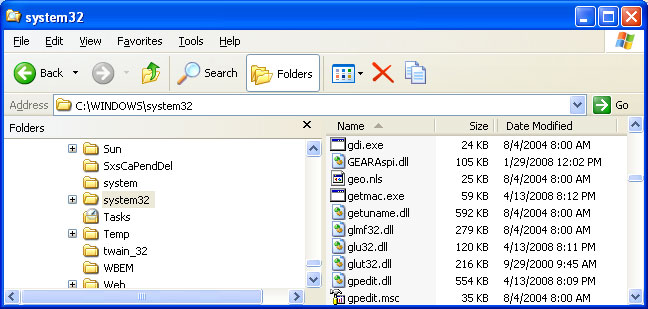
There may be a newer version of this file there, already. Replace that version with the one you unzipped (if you keep the newer version your programs will not link correctly.)glut32.dll -- move this file to C:\WINNT\System32, or similar location.
Copy from your "unzipped" subdirectories:
To here:
The location for this file depends on your operating system. The directory where it goes is the directory that holds the dynamic load libraries (*.dll). An easy way to find where it should go is to look for glu32.dll (use "Search" from the start menu).
The directory to use should also have the files glu32.dll and opengl32.dll. These should have come with your operating system.

IV. Test Dev-cpp with GLUT
The essential step in compiling and running a C program that contains OpenGL and GLUT functions is to tell the linker where the libraries are. This is done by clicking Project/Project Options/Parameters/Add Library or Options and then navigating to the libraries you need to include: libopengl32.a, libglu32.a, and libglut32.a. The libraries should be added in that order.Details:
a. Create a subdirectory for a project. Do this first, before you start Dev-Cpp. Create a new subdirectory with "Explorer" by clicking "File/New/Folder".CONCLUSION
For example, create a folder C:\GLproject.
b. Start Dev-cpp:
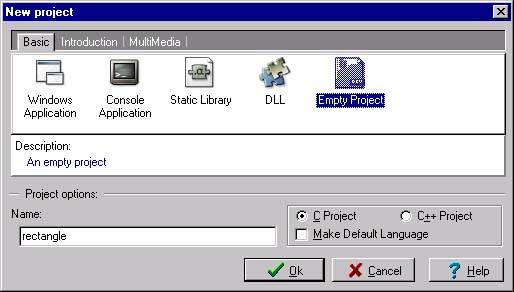
c. Start a new project by clicking File/New/Project. In the panel that pops up, name the project something like "rectangle", click on "empty project" and "C": Click OK.
Note: For compiling with OpenGL you must create a project. You need to have a project (not just a single C file) in order to link in the OpenGL libraries.
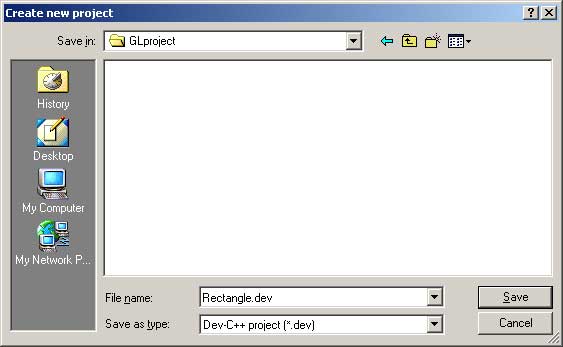
d. In the next panel, navigate to your folder C:\GLproject, and click "Save".
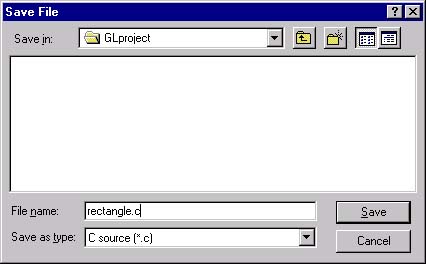
e. In Dev-C++, click "File/New/Source File" and then in the next panel "Add to Project" click "yes". Click "File/Save As" and then give the file a name. Navigate to your project subdirectory to save the file in it. Name the file something like "rectangle.c"
Be sure that the file names ends with ".c" anything else will cause big problems.
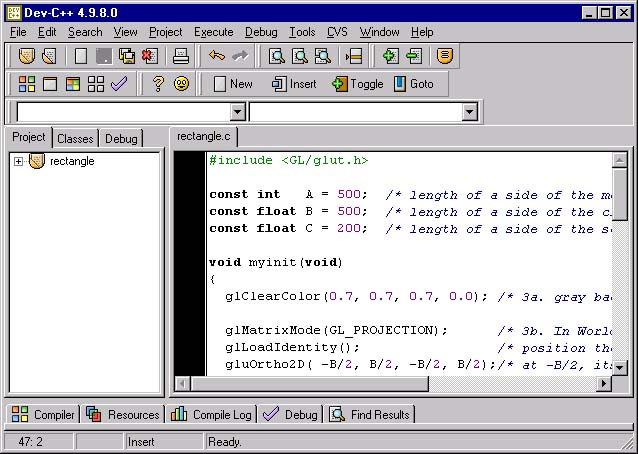
f. Click and drag your mouse over the following program so that it is highlighted, then click "Edit/Copy" from the browser's menu bar.
#include <GL/glut.h>

const int   A = 500;  /* length of a side of the monitor window */
const float B = 500;  /* length of a side of the clipping rectangle */
const float C = 200;  /* length of a side of the square the program draws */

void myinit(void)
{
  glClearColor(0.7, 0.7, 0.7, 0.0); /* gray background */

  glMatrixMode(GL_PROJECTION);      /* In World coordinates: */
  glLoadIdentity();                 /* position the "clipping rectangle" */
  gluOrtho2D( -B/2, B/2, -B/2, B/2);/* at -B/2, its right edge at +B/2, its bottom */
  glMatrixMode(GL_MODELVIEW);       /* edge at -B/2 and its top edge at +B/2 */
}

void display( void )
{

  glClear(GL_COLOR_BUFFER_BIT);     /* clear the window */

  glMatrixMode(GL_MODELVIEW);       /* The following coordinates are expressed */
  glLoadIdentity();                 /* in terms of World coordinates */

  glBegin(GL_POLYGON) ;             /* draw a filled polygon */
      glColor3f ( 1.0, 0.3, 0.2);       /* draw in light red */
      glVertex2f( -C/2, -C/2 );         /* (x,y) */
      glVertex2f(  C/2, -C/2 );         /* (x,y) */
      glVertex2f(  C/2,  C/2 );         /* (x,y) */
      glVertex2f( -C/2,  C/2 );         /* (x,y) */
  glEnd();

  glFlush();                        /* send all commands */
}

void main(int argc, char** argv)
{
  glutInit(&argc,argv);
  glutInitWindowSize( A, A );       /* A x A pixel screen window  */

  glutInitDisplayMode( GLUT_RGB | GLUT_SINGLE);
  glutCreateWindow("My Rectangle"); /* window title                   */
  glutDisplayFunc(display);         /* tell OpenGL main loop what     */
  myinit();                         /* set attributes                 */

  glutMainLoop();                   /* pass control to the main loop  */
}
g. Now click in the editing window of Dev-cpp and then click "Edit/Paste" in its menu bar. The program will appear in the editing window.
h. Click "File/Save". The file in your project directory should now contain an OpenGL program.
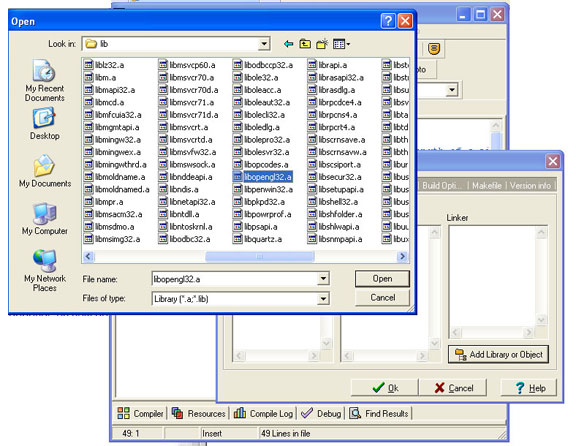
i. Tell Dev-cpp what libraries need to be linked. Click "Project/Project Options".
j. Now click "Parameters". Click the "Add Library or Object" button and navigate to the libraries that should be added, found under C:\Dev-cpp\lib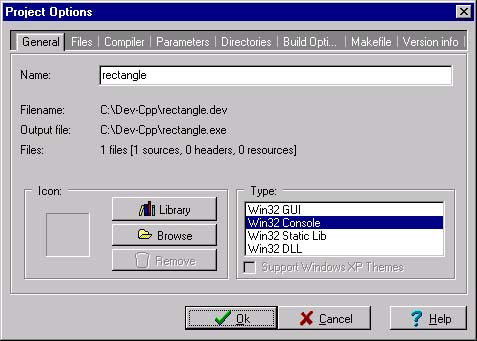
Add them in that order (only). Notice that the slashes will appear in Unix style "/" rather than DOS-style "\".
- ../lib/libopengl32.a
- ../lib/libglu32.a
- ../lib/libglut32.a
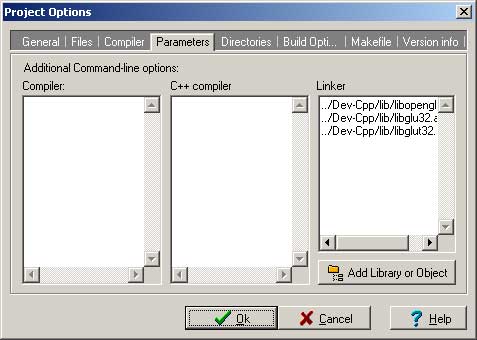
When you are done adding the three libaries, you should see:
The exact pattern of "../../.." you see depends on how deep in the directory structure your source file lies.
Click "OK".
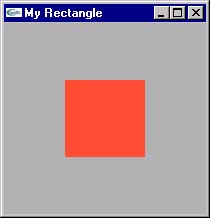
k. Click "Execute/Compile and Run". The program should compile, link, and run:
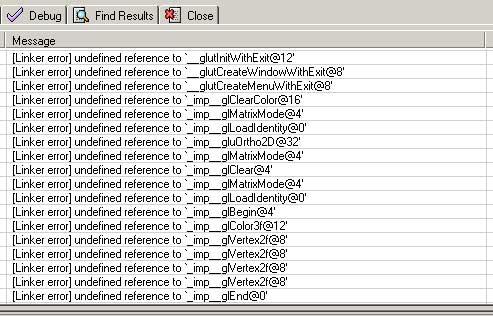
If things don't work (very common) click on the "Compile Log" tab for some confusing error messages. If you see something like the following, it means that you made a mistake in adding the libraries to the project:
Try to fix the list of libraries, or perhaps start over from scratch.
You now are finished, or have given up.

first I did not know what to buad c + + improvement, I work so that I can test my mind so FTPP make c + +...
Tiada ulasan:
Catat Ulasan